The Wedding Balloon Arch
It Really is Simple!
I'm sure you're familiar with the concept of the wedding balloon arch but perhaps you think they're way too difficult for you to make on your own?
But they're actually quite simple! Once you know one simple step, all you have to do is repeat it until you have a wedding arch. I’ll explain more about that later.
The main advantage of a wedding balloon arch is that wedding balloon decorations are a cheap way of making a big impact on your guests and all for a relatively small cost, which let's face it is exactly what we want to achieve.
Before I get down to showing you the easiest way, (in my opinion), of making balloon arches there are some decisions you'll need to make:
- Do you want to use Helium filled balloons or air filled balloons? - Helium filled balloons will not need additional support but will start to sink after 6-8 hours (unless you use something like "Hi-Float") whereas an air filled balloon will last longer but will need additional support.
- Are you going to use more than one colour of balloon for the arch? - Personally I think they look better if you use two colours. However if you're going to use more than one colour it's important to repeat your pattern exactly the whole way through construction. Otherwise it can look cheap, nasty and homemade.
- Get all your raw materials before starting i.e. -
- Ribbon.
- Scissors.
- Latex balloons.
- A helium cylinder (make sure you have enough to fill your required number of balloons).
- A product like "Hi-Float" will make your Helium balloons stay afloat longer.
- If using air filled balloons you'll need an electric balloon pump or a hand pump (don’t even try to blow them up yourself – you’ll pass out!).
- A PVC pipe or metal wire to form the frame for air filled balloons.
- As many willing helpers as you can get.
Steps to making a wedding balloon arch (of any length):
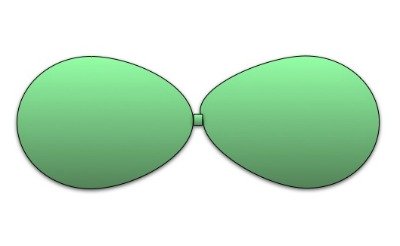
- Start by inflating two balloons of the same colour to the same size (it helps to have a cardboard template so that all the balloons are the same size) and tying the ends of the two balloons together. If you're using Helium it may be easier to blow the balloons up as you need them. If using air balloons it is easier to blow up ten or twenty at a time.
- Then blow up two more balloons of your second colour to the same size (use your cardboard template to check) and then tie the necks of these two balloons together.
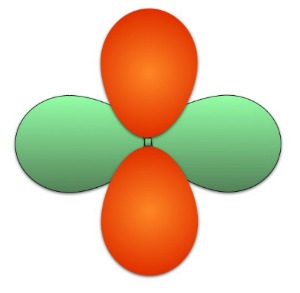
- You now have two pairs of balloons tied at the necks. The next step is to twist the necks of one pair of balloons around the other pair so that you are left with four balloons all twisted together. This is your base for the wedding balloon arch.
- Then you tie a long piece of ribbon or string around the neck of the four base balloons. This should be around 15% longer than the length of your required balloon arch. But don’t worry too much as you can tie another piece to it if it’s not long enough!
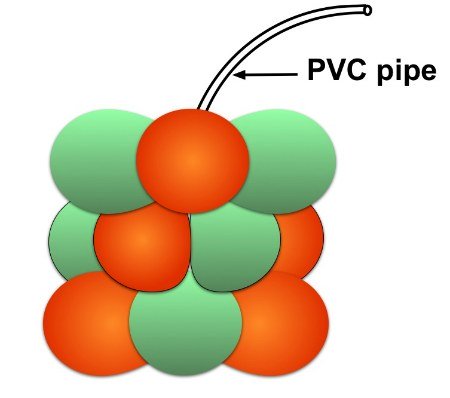
- Next step is to repeat the above steps to make up another four balloons which can then be set on top of the first set and twist the supporting ribbon or string around one of the balloons in the second set to secure them to the first set.
- It is then simply a matter of repeating these steps until your arch is at your desired length.
If you 're using Helium balloons you won't need to provide support for your arch. But if you are using air filled balloons you will need to add additional support in the form of bendable wire or PVC piping which can be fed into the balloons after you have made your arch to provide the shape.
As you can see creating a stunning wedding balloon arch is actually a simple process. Once you master the basic step of creating the four balloon base it's just a matter of repeating the process over and over again.
But please remember that time is your enemy when it comes to Helium filled balloons as they'll start to sink after 6-8 hours unless you use one of the products for coating the inside of the balloons (such as "Hi-Float") before you fill them.
You should also take care to get the repeat right on each set of four balloons before you attach them as it can be a major pain to try and correct it later.
Once you have mastered balloon arches you will have no trouble making wedding balloon centrepieces.
Return from Wedding Balloon Arch to Cheap Wedding Decorations.


New! Comments
Have your say about what you just read! Leave me a comment in the box below.